RULES FOR SMITH AND HELPER
 HE smith should never turn the iron on the helper's blow, he should turn on his own blow, that is, never turn the iron so that the helper's blow will hit it first because he is not prepared for it and cannot strike with confidence, but the smith will not be bothered by turning the iron for himself as he knows when he turns and is prepared for it. The smith should strike the first blow in starting, or signal the helper where to strike, in case the smith cannot strike the first blow. The smith calls the helper by three blows on the anvil with his hammer, and when the smith wants the helper to cease striking he taps with the hammer twice on the anvil. The helper should strike the blow he has started when the smith signals him to stop. The helper should watch the time of the smith's hammer; if fast, keep time with it, if slow, keep time with it. The helper should strike where the smith strikes or over the center of the anvil. The helper should always lift the sledge high, in order to give the smith a chance to get in with the hammer.
 |
It is proper before we go any farther to say a few words about the fire.
An old foreman in the blacksmith department of a factory told me once in a conversation we had about the fire, that he had come to the conclusion that very few blacksmiths have learned how to make a good fire. It takes years of study and practice before the eye is able to discern a good fire from a bad one. A good fire must be a clear fire, the flame must be concentrated and of a white color. Even the nose must serve to decide a bad fire from a good one. A strong sulphur smell indicates a poor fire for welding. In order to get a good fire there must be, first, good coal; second, plenty of it. It is no use to pile a lot of coal on an old fire, full of cinders and slag. The fire-pot must be clean. Many blacksmiths are too saving about the coal. They take a shovel of coal, drop it on the forge in the vicinity of the fire and sprinkle a handful of it in the fire once in a while. In such a case it is impossible to do good work and turn it out quick. Have a scoop shovel and put on one or two shovels at a time, the coal should be wet. Then pack it in the fire as hard together as you can. Sprinkle the fire with water when it begins to spread. In this way you get a hard fire. The flames are concentrated and give great heat. Saving coal is just like saving feed to a horse, or grub to your apprentice. Neither will give you a good day's work unless he has all he wants to eat. The fire, of course, should be in proportion to the work, but in every case should the fire be large enough to raise it up from the tuyer iron as much as possible. In a small fire the blast strikes directly on the iron and it begins to scale off; in a good fire these scales melt and make it sticky, while in a low and poor fire the scales blacken and fall off. This never happens if the fire is full of good coal and high up from the tuyer iron.
Good strong blast is also necessary for heavy work. There is an old whim about the fire that everybody, farmers and others, as well as blacksmiths, are infected with, and that is, if a piece of brass is put in the fire it renders the fire useless to weld with. Now, while it is a fact that brass is not conducive to welding it takes a good deal of it before the fire is made useless. One smith will not dare to heat a galvanized pipe in his fire, for fear it will spoil it, while another smith will weld a piece of iron or steel to such a pipe without difficulty. Don't swear and curse if the fire is not what you expect it to be, but simply make it right. Some smiths have the habit of continually poking in the fire, if they weld a piece of iron they never give it rest enough to get hot, but turn it over from one side to another and try to fish up all the cinders and dust to be found in the fire. This is a bad habit. Yellow colored fire is a sign of sulphur in the fire and makes a poor fire for welding. Dead coal makes a poor fire.
One of the chief reasons for a poor fire is a poor blast. No patent tuyer will give blast enough unless you run it by steam and have a fan blower. Ninety per cent of the blast is lost in transmission through patent tuyers. The only way to get a good blast is to have a direct tuyer, and one with a water space in.
To make a direct tuyer take a pipe 1 ¼ x 12 inches long, weld around one end of this pipe an iron 3 5/8 to make it thick on the end that is in the fire, flare out the other end for the wind pipe to go in and place it horzontal in the fire and fill up around it with fireproof clay. This gives the best fire. The only objection to this tuyer is that where soft coal is used, as is mostly the case in country shops, it gets hot and clogs up, but with a strong blast and good hard coal it never gets hot, provided the fire is deep enough. From five to eight inches is the right distance from the tuyer to the face of the fire. In factories this kind of tuyer is used, and I have seen them used for ten years, and never found
them to clog once. The tuyer was just as good after ten years use as it was when put in.
To make a water tuyer take a pipe 1 ¼ x 12, weld a flange on each end for water space, now weld another pipe over this, and bore holes for ¼ inch pipes in the end, where the blast goes in. One hole on the lower or bottom side should be for the cold water to go in through, and one hole on the upper side for the hot water to go out through. These pipes to connect with a little water tank for this purpose. The pipes should be watched so that they will not be allowed to freeze or clog, as an explosion might follow. These tuyers never clog. I now use one that I have made as above described. The dealers now have them to sell. Any smith can get them as they are hard to make by the average smith.
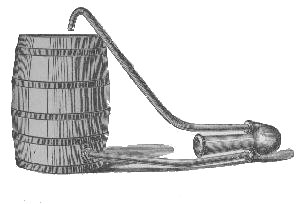
I have tried many kinds of blowers and I shall give my brother smiths the advantage of my experience.
Portable forges run with fan blowers are fair blowers if you are strong enough to pump away at high speed, but it takes a horse to do that, and as soon as you drop the lever the blast ceases. Root's blower works easier, but the objection is the same, as soon as you drop the crank the blast stops. Besides this trouble, this blower is often in the way. I have never found anything to beat the bellows yet, if you only know how to use them.
Never take a set of bellows less than 48 extra long. Cut the snout off so that it will give a hole 1 ½, and with a water tuyer this blower cannot be beaten, except by a fan blower run by steam. The bellows should be hung over head to be out of the way. When these bellows are full of wind they will blow long enough after you have dropped the lever to do quite a good many things around the forge, and to handle the iron in the fire with both hands as is often necessary.
Welding iron is easy and no other welding compound is needed than sand, unless it is a case when the iron is liable to burn or scale off, borax will prevent this. There are three kinds of welds, butt, lap and split. The butt weld is most used in welding iron. The ends should be rounded off a little so that the center will weld first. Weld the ends this way either in the fire or on the anvil, butting the ends while you strike over and dress down the weld. In welding lap welds upset the ends and make them a good deal heavier than the size of the iron is; then lap the ends with a short lap. New beginners will always make a long lap. This is wrong, for if the lap is long it will reach beyond the upset part and the ends cannot then be welded down, without you make it weak. If soft steel is welded cut a short cut with the chisel in the center of the lap, as shown in Figure 6, No. 1. This cut will hook and prevent the ends from slipping; if properly prepared this weld will not show at all when done.
Split weld is preferable when steel is to be welded, especially tool steel of a heavy nature, like drill bits for well drillers.
If the steel is welded to iron, split the iron and draw out the ends as thin as possible and make it the shape shown in Figure 6, No. 2. Taper the steel to fill the split made in the iron, when it fits perfectly cut beard in it to catch in the lips of the iron when fitted in. See Figure 6, No. 2. When finished heat the split end and cool off the tapered end. Place the tapered end snug up in the split and hammer it together with a heavy sledge. If there is any crack or opening at the end of the tapered end, plug it up with iron plugs, if this is not done, these holes will be almost as they are, because it is hard to weld a heavy shaft or drill, or rather, it is hard to hammer them together so the holes will close in. Now heat, but if you have tool steel go slow, or your steel will burn before the iron is hot enough. Weld the lips while the rod or drill is in the fire. For this purpose use a hammer with an iron handle in. When the lips are welded all around take it out and let two good helpers come down on it with all their might. When welded smooth it up with the hammer or flat hammer.
Welding steel is quite a trick, especially tool or spring steel. The most important part to remember is, to have a good clean fire, and not to over heat the steel, To a good smith no other compound is needed than borax, but if this is not sufficient, take some borings from your drill, especially fine steel borings, and cover the weld with this and borax, and if a smith cannot weld with this compound there is no use for him to try. Most of the welding compounds are inferior to this, but some smiths would rather believe in something they don't know anything about; another will not believe in anything he can get for nothing.
When a round object is to be ironed or a hoop put on to anything round, measure, that is, take the diameter then multiply by three, add three times the thickness of the iron (not the width), add to this one time the thickness of the hoop for the weld and you have the exact length of the iron needed; in other words, three times the diameter, four times the thickness of the band. This is a simple rule, but I know a good many old smiths who never knew it.
To weld seeder shovels is no easy job. Prepare the shovel; shape almost to it proper shape, draw out the shanks, weld the points first, heat shovel and shank slow, then fit them together so that no cinders can get in between. Now remember, if your fire is not at least five inches up from the tuyer iron, and clear, it is no use to try. Hold your shovel in the fire, shank down. Heat slow, use borax freely and apply it on the face side of the shovel to prevent it from burning. Whet. ready, weld it over the mandrill and shovel will have the right shape. If soft center, harden like a plow lay.
Every smith knows how to drill, sometimes it gives even an old smith trouble. The drill must be true, the center to be right, if one side of the drill is wider than the other or the drill not in proper shape the hole will not be true. For centuries oil has been used for drilling and millions of dollars have been spent in vain. It is a wonder how people will learn to use the wrong thing. I don't think that I have ever met a man yet who did not know that oil was used in drilling. In drilling hard steel, turpentine or kerosene is used as oil will then prevent cutting entirely. Nothing is better than water, but turpentine or kerosene is not as bad as oil; if you think water is too cheap use turperitine or kerosene. I had occasion once to do a little work for a man eighty years old, and when I drilled a hole, used water. The old man asked if water was as good as oil, and when informed that it was better, said: "I used to be quite a blacksmith myself, I am now eighty years old, too old to do anything, but I am not too old to learn." it ought to suggest itself to every smith that while oil is used in boxes to prevent cutting, it will also prevent cutting in drilling.
First prepare a drill which is thicker at the point than usual, and oval in form, then harden it as follows: heat to a low cherry red heat and cool in the following hardening compound: two quarts soft water, one-half ounce sal-ammoniac, salt, three ounces. Don't draw the temper, for if you have the right heat you will get the right temper. Now drill and use water, not oil. Feed carefully but so the drill will cut right along. If you have no chance to get the compound, harden in water but draw no temper, let it be as hard as it will.
If the iron is too hard to be drilled and you can heat the same do so, heat to a low red heat and place a piece of brimstone just where the hole is to be; this will soften the iron through, so the hole can be drilled. Let it cool slowly.
Standing coulters are made of different materials and of different shapes. Take a piece of iron 2 x ½, twenty-eight inches long. Cut off the end after you have thinned it out about 5 inches from the end, cut diagonally. Now weld the cut-off piece to the main shank. The cut-off piece to be laid on the outside and welded, bend the iron as soon as it is welded so that it has the shape of the coulter, draw out a good point and sharpen the iron just the same as if it was a finished coulter. This done, cut off a piece of steel, an old plow lay that is not too much
 |
worn will do, cut the shape of the coulter you have now in the iron, and let the steel be half an inch wider than the iron, but on the point let it be as long as it will, because the point ought to be quite long, say about nine inches. Next draw the steel out thin on the upper end, heat the iron red hot, place it on the anvil outside up, put a pinch of borax on it at the heel, then a pinch of steel borings, place the steel on top of this and keep in position with a pair of tongs; now hold it on the fire heel down, and heat slow. When it is hot let the helper strike a pressing blow or two on it and it will stick until you have taken the next weld. Put borings and borax between steel and iron for each weld. When finished, the angle should be that of the square; that is, when you place the coulter in the square the shank should follow one end of the square and the foot of the coulter the other. The edge of the outside side should follow the square from the point up. When it does it looks like a hummock in the coulter but it is not. Old breakers will be particular about this as it will cut a clean furrow if it is made in this way and it will work easier. If the edge stands under the square the coulter will wedge the plow out of land and make a poor furrow. Next finish the chisel point, soft or hard steel as you please; weld it to the coulter on the inside, that is, the side next to the furrow.
Last punch or drill the hole in the heel. The coulter should not be hardened except a little on and along the point. There is no need of a double chisel point, such a point will be too clumsy and run heavy. I have received a premium on a coulter made in this shape.
Mill picks are very easily dressed and hardened, the whole trick in this case, as in many others, lies in the right heat of the steel. Be careful not to heat to a higher than a red heat. Dress the pick and temper with a low heat, when the color is dark yellow the temper is right, if the steel is of the right kind. No other hardening compound is necessary than water. After a little experience any smith can do this work first class.
A smith once wanted to buy my receipt for tempering. He believed I had a wonderful prescription, or I could not succeed as I did. I told him I used only water, but he insisted that I was selfish and would not reveal it to him.
If tools and receipts would do the work there would be no need of experienced mechanics. Tools and receipts are both necessary, but it must be a skilled hand to apply them.
The best way to harden files is to have a cast iron bucket filled with lead. Heat it until the lead is red hot, then plunge the file into this, handle up. This will give a uniform heat and the file will not warp so easy if the heat is right. In cooling the file off, use a box four or five feet long with salt water in, run the file back and forth endwise, not sideways, that will warp the file, take it out of the water while yet sizzling. Now, if warped, set it between a device so that you can bend it right. While in this position sprinkle water over where you straighten until cold and the flle will be right.
Heat the tap or die to a red cherry, cool off entirely in water, brighten with an emery paper. Now, hold over a hot iron until the tap or die has a dark straw color, then cool off. If a light tap, the temper can be drawn over a gaslight, using a blowpipe.
To make a butcher knife, one smith will simply take an old file, shape it into a knife, and harden. The best way to make a knife is to first draw out a piece of iron ¾ inch wide and 1/16 of an inch thick, twice the length of the knife. Prepare the steel the same width as the iron, 1/8 of an inch thick, weld this steel in between the iron. This will make a knife that will not break. When ready to harden heat to a low red heat, cool off entirely in water. Brighten and hold over a hot iron until brown, then cool off.
The steel should be good tool steel, a flat file will do, but the cuts must be ground or filed off entirely before you touch it with the hammer, for if the cuts are hammered in they will make cracks in the edge of the knife, and the same will break out.
If a circular saw is cracked it can be repaired so that the crack will go no further, and if the crack is deep, it can be so remedied that there will be no danger in using it. Ascertain the end of the crack, then drill a 3/16 -inch hole so that the crack will end in that hole. Countersink on each side and put in a rivet. Don't let the rivet stick its head over the face of the saw.
If the crack is deep put another rivet about half an inch from the edge. If the saw is too hard to drill, heat two irons about 1 square or round, square up the ends and set the saw between the ends so that they will meet over the place where the hole is to be drilled. When the saw is dark blue, the temper is out. It might be a possibility that this will spring the saw in some cases, therefore, I advise you to try drilling the hole without any change in temper. Prepare a drill that is harder than usual, use no oil, but water.
The reason why a circular saw cracks is, in most cases, incorrect filing. In filing a saw, never let a flat file with its square corners touch the bottom of the teeth you are filing; if you do, you will make a short cut that will start the crack. The best way is to gum the saw in a saw gummer or on an emery wheel, or use a round-edged file.
Belts can be riveted, sewed, or hooked together. A new leather belt should not be riveted, because such a belt will stretch and have to be cut out and sewed over quite often at first. There are hooks made of steel for belt sewing, these are all right when the pulleys are not less than six inches in diameter and the speed is slow. In using the hooks be careful not to bend them too sharp or drive the bends together too hard; in so doing they will cut through the leather and pull out. Lacing is the best for all kinds of belts.
In sewing a belt with lacing, first punch with a punch made for this purpose, holes in proportion to the width. Don't punch them too close to the ends. Begin sewing in the center holes and start so that both ends of the lacing will come out on the outside of the belt. Now sew with one end to each side, and be careful not to cross the lacing on the side next to the pulleys. The lacing should be straight on that side. When the belt is sewed punch a small hole a little up in the belt to receive the last end of the lacing; the last end should come out on the outside of the belt. In this end cut a little notch about three-fourths through the lacing close to the belt, and then cut the lacing off a quarter of an inch outside of this notch. This notch will act as a prong and prevent the lacing from pulling out. Tap it lightly with a hammer above the seam to smooth it down.
In placing shafts to be connected by belts, care should be taken to get the right working distance one from the other. For smaller belts 12 to 15 feet is about the right distance. For large belts, a greater distance is wanted. The reason for this is that when pulleys are too close together there is no sag in the belts and they must therefore be very tight in order to work.
Belts should not have too much sag, or they will, if the distance between the pulleys is too far apart, produce a great sag and a jerking motion which will be hard on the bearings. Never place one shaft directly over another, for then the belts must be very tight to do the work, and. a tight belt will wear out quicker and break oftener in the lacing than a loose one; besides this the bearings will give out sooner.
If a belt slips use belt oil or resin, or both.
In repairing old bob sleds is is difficult to find shoes to suit. But in every case the shoe can be fitted to suit without touching the runner. The trick here as in many other cases in the blacksmith business, lies in the heating. Any shoe can be straightened or bent to fit the runner if only heated right A low cherry-red heat and a piece if iron to reach from the crooked end of the shoe and far enough back to leave a space between where it wants to be straightened. Now put it in the vise and turn the screws slowly and the shoe will stand a great deal. If too straight, put the shoe in between a couple of beams so that you can bend it back to the right shape. Remember the heat.
I have put on hundreds and never knew of a shoe that broke when the heat was right. I must confess, however, that my two first shoes broke, but I think I learned it cheap when I consider my success after that. The shoe should fit the runner snug. Ironing bobs is a very simple and easy thing, every blacksmith, and even farmers sometimes, are able to iron their own sleds fairly well, and I don't think it will be of much interest for the readers of this book to treat that subject any further.
Dressing axes is quite a trick and few blacksmiths have mastered it. It is comparatively easy when one knows how. I have several times already warned against over heating and if this has been necessary before, it is more so now in this case. In heating an ax do not let the edge rest in the center of the fire, it will then be too hot at the edge before it is hot enough to hammer it out. Place the edge far enough in to let it over the hottest place in the fire. Go slow. When hot, draw it to the shape of a new axe, don't hammer on one side only. In so doing the ax will be flat on one side and curved up on the other. If uneven trim it off; trim the sides also if too wide; don't heat it over the eye; be sure you have it straight. When ready to harden, heat to a low red heat and harden in luke warm water. The heat should be only brown if it is a bright sunny day. Brighten and look for the temper. You will notice that the temper runs uneven; it goes out to the corners first, therefore dip them (the corners) deeper when cooling, and with a wet rag touch the place on the edge where the temper wants to run out. Some smiths, when hardening, will smear the ax with tallow instead of brightening it, and hold it over the fire until the tallow catches fire, then cool it off. This is guess work, and the axe is soft in one place and too hard in another. Tbe best way is to brighten the ax and you can see the temper, then there is no guess work about it. When blue cool it partly off and then while the ax is still wet you will observe under the water or through the water a copper color. This color will turn blue as soon as the ax is dry, and is the right color and temper. Cool it slowly, don't cool it off at once, but let it cool gradually, and it will be both hard and tough.
By this simple method I have been very successful, breaking only three per cent, while no new ax of any make will ever do better than ten per cent. Some will even break at the rate of twelve and thirteen per cent.
The ax factories, with all their skill and hardening compounds, have to do better yet to compete with me and my simple method.
Well drills are made of different sizes and kinds. Club bits and Z bits. How to dress: heat to a low red heat. If nicked or broken, cut out, otherwise draw it out to the size wanted. The caliper should touch the lips of the bit when measured diagonally so that the bit has the size on all corners. Heat to a low red heat and harden, the temper to be from dark straw color to blue according to the kind of drilling to be done. The trick, in two words, low heat.
By granite tools is meant tools or chisels used by granite or marble workers for cutting inscriptions on tombstones.
When a man understands how these tools are used it is easier to prepare them. These are the kind of tools where an unusual hardness is required. The hammer used in cutting with this chisel is very small, and the blow would not hurt your nose, so light it is, therefore they will stand a high heat and temper. The chisels should be very thin for this work. When dressed and ready to harden, heat to a red heat and harden in the following solution: one gallon soft water, four ounces salt. Draw the temper to a straw color.
A blacksmith once paid a high price for a receipt for hardening granite tools. The receipt was, aqua, one gallon; chloride of sodium, four ounces. This receipt he kept as a secret and the prepared compound he bought at the drug store, thus paying 50 cents for one gallon of water and four ounces of salt. The real worth is less than a cent. It is said he succeeded remarkably well with his great compound, which he kept in a jug and only used when anything like granite tools were to be hardened. The reason why he succeeded so well was because of his ignorance concerning his compound, not because it was not good enough. I hold that it is one of the best compounds, in fact, the best he could get. People in general like to be humbugged. If they only get something new or something they don't know anything about, then they think it wonderful.
Salt and water should be called salt and water, and be just as much valued. Let us "call a spade a spade," the spade will not be more useful by another name, nor will it be less useful by calling it by its proper name.
Next
Chapter 2
Previous
Return to Main Page
© 2000, 2001 by Lynn Waterman